

Discover the Best Parts for Kitchen Sink Disposals Today
December 23, 2025
Fast Fixes for Urgent Plumbing Problems – Quick Solutions
January 6, 2026Kitchen Garbage Disposal Troubleshooting: Step‑by‑Step Fixes for Common Problems
A broken or poorly performing kitchen garbage disposal disrupts daily life and can cause standing water, bad smells, or even plumbing damage if left alone. This guide walks you through how disposals work, the most common failure modes, and clear, safe troubleshooting steps so you can often diagnose — and sometimes fix — minor problems yourself. You’ll learn how to check power and the reset button, free a humming or jammed unit, find and stop leaks, clear slow drains and clogs, and remove stubborn odors with household tools and safe methods. We also explain when a problem calls for a pro and how a local plumbing service can help with same‑day repairs, financing, and guaranteed workmanship. Read the sections in order — components, power, jams, leaks, clogs, odor control, professional help, and maintenance — to work through issues methodically and reduce repeat trouble.
What Are the Key Components of Your Kitchen Sink Garbage Disposal?
A garbage disposal is a compact grinder that chops food into small particles before sending them down the drain. Knowing the main parts helps you spot where problems start. Key components include the motor, impellers, shredder ring, flywheel, the reset (overload) button, sink flange, drain line, and the gaskets or seals. Each part plays a role in grinding, sealing, or draining — and each produces distinct symptoms when it fails (for example, humming when the motor turns but the impellers are stuck). Learning these names and functions prepares you for the safe troubleshooting steps ahead.
Which Parts Should You Know to Troubleshoot Effectively?
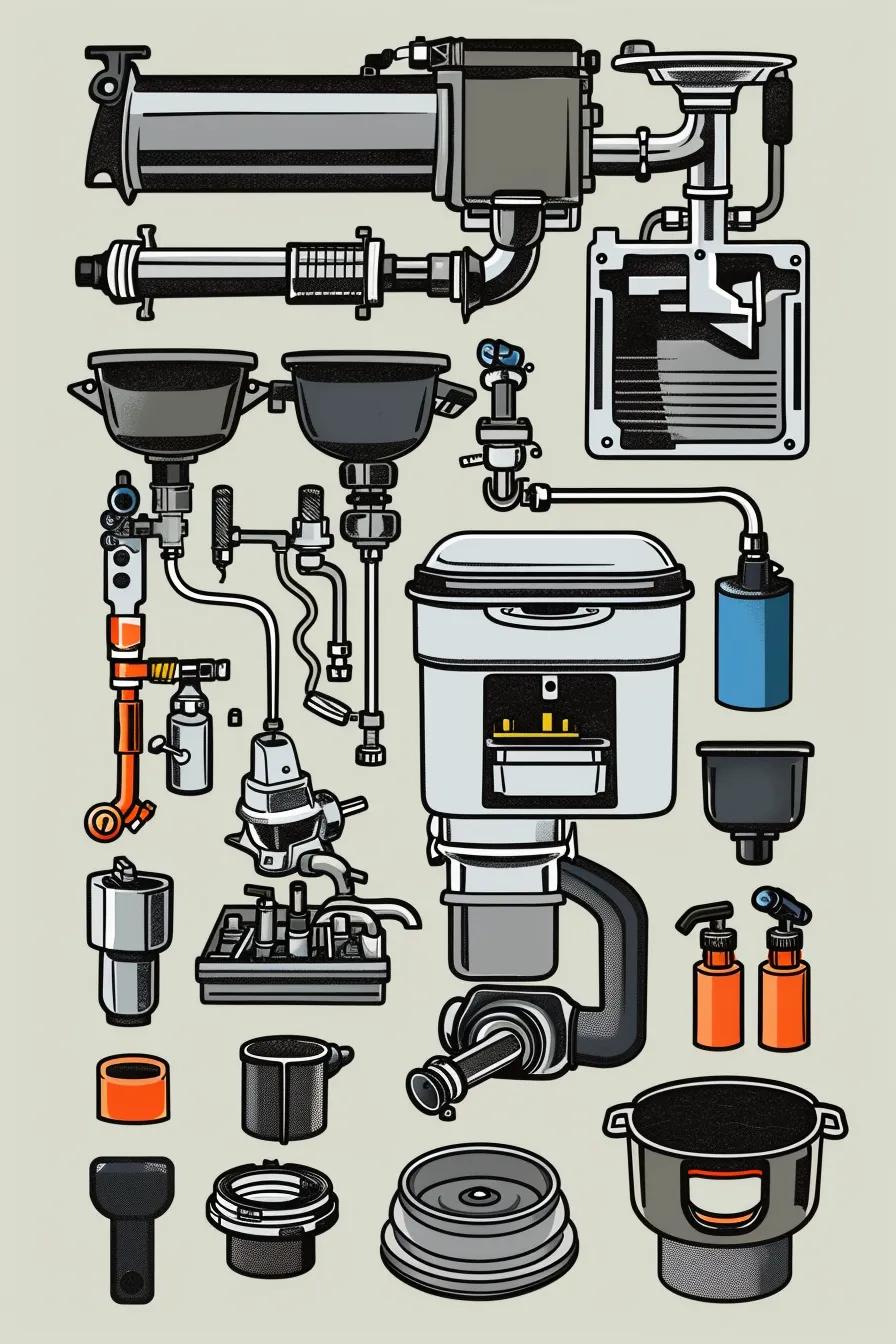
Focus on a few visible and serviceable parts: the motor, impellers, shredder ring, reset button, sink flange, dishwasher hose connection, and seals. The motor provides the turning force and will often hum if overloaded. The impellers and shredder ring do the actual grinding and are the usual cause of jams when hard or fibrous items get trapped. The reset button sits under the housing and trips to protect the motor — repeated trips usually point to a deeper electrical or mechanical issue. Leaks commonly show at the sink flange, gaskets, or hose connections. Spotting which component shows trouble helps you decide if a DIY fix is reasonable or if you should call a professional.
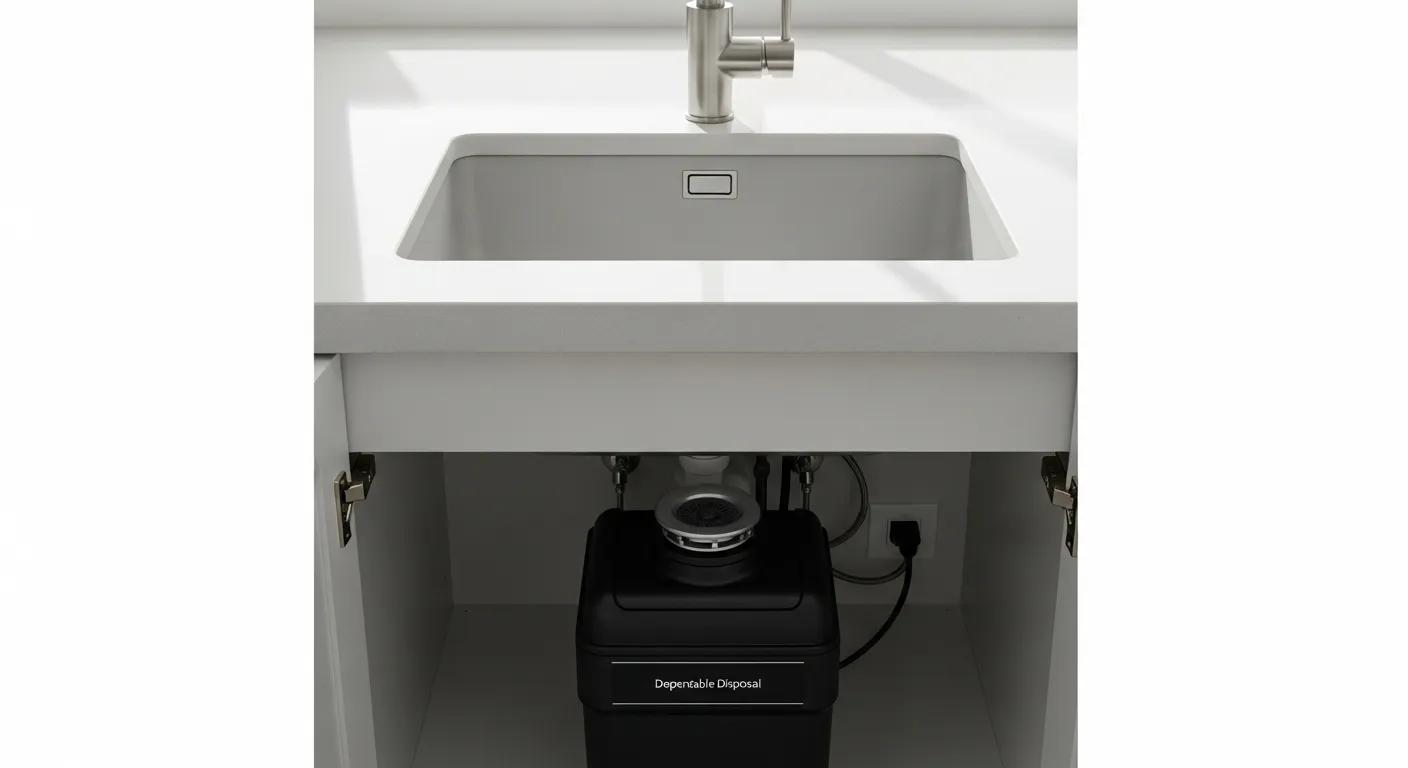
How Does Your Garbage Disposal Work Inside the Kitchen Sink?
Food enters through the sink flange, where the motor spins the flywheel and impellers to press waste against the shredder ring, breaking it into small pieces that flow into the drain line. When you flip the switch, electrical power turns the motor; water and gravity then carry the ground material away. Dishwashers usually drain into the disposal via a hose and air gap — a clogged or loose hose can cause backups or smells. Understanding the path from flange to drain makes it easier to trace where a problem is coming from and follow the safe diagnostic steps in the next section.
Before you touch any wiring or internal parts, review basic safety steps and gather the right tools so you can test power and work safely.
Why Is My Garbage Disposal Not Working or Turning On?
If the disposal won’t turn on, the cause is usually electrical (outlet, switch, breaker), the reset button has tripped, or the motor has failed. Start with the simplest, safest checks: confirm power at the outlet and wall switch, try the reset button, then check the circuit breaker. That order helps you separate an external power issue from an internal motor fault. Always make sure the circuit is safe — switch off the wall switch, unplug if you can, and never reach into the sink opening while the unit could be live. If basic checks don’t fix it, patterns like repeated reset trips or a tripped breaker point to when you should call an electrician or plumber.
How Do You Check the Power Supply and Electrical Outlet?
Test the outlet with a small appliance (keeping the disposal switch off) to confirm the outlet is live. If the outlet is dead, look for a nearby GFCI and reset it — some disposals are tied into a GFCI circuit. Inspect the wall switch for visible damage and ensure the disposal’s plug (if accessible) is fully seated. Don’t open the unit’s wiring if you don’t have electrical experience. If the outlet works for other devices but the disposal still won’t run, move on to the reset button and breaker checks below, and stop if you encounter exposed wiring or recurring electrical faults.
How and When Should You Use the Reset Button?
The reset button is an internal overload protector (often red or black) located on the bottom or side of the unit. To use it: turn the switch off, let the motor cool for a minute, then press the button firmly until it clicks. That often restores power after an overload. If the reset button restores operation but trips again quickly, the motor may be failing or the unit is obstructed — repeated trips warrant professional diagnosis. After a successful reset, run cold water and test the disposal briefly to confirm it’s working normally.
What Role Does the Circuit Breaker Play in Disposal Power Issues?
The breaker trips to protect your home wiring if the disposal draws too much current. If the outlet and reset look fine, check the electrical panel for any tripped breakers (they may sit halfway between on and off). Switch the breaker fully off and then back on to reset it. Frequent trips suggest a short, a failing motor, or too many loads on the same circuit and mean it’s time to call an electrician or plumber. If the breaker trips immediately after resetting or you smell burning, stop and arrange professional service to avoid hazards.
If the disposal powers up but only hums, the problem is likely mechanical (a jam) rather than electrical; the next section explains safe steps to clear a jam.
How Can You Fix a Garbage Disposal That Hums but Doesn’t Grind?
When a disposal hums, the motor is getting power but the impellers are stuck or the flywheel is seized. The safest first step is to disconnect power at the breaker or unplug the unit, then use the disposal’s hex socket and an Allen wrench to manually turn the motor shaft and free the obstruction. If there’s no bottom hex socket, use long‑handled tongs or pliers to remove visible items from the chamber — never use bare hands. After freeing the jam, press the reset button and test with cold water. If the unit still hums, the motor may be failing and you should contact a professional.
How Do You Identify and Clear a Jam Using an Allen Wrench?
With power off, insert the correct‑size Allen wrench into the hex socket on the bottom of the unit and rotate back and forth to free the impellers and flywheel. Feeling resistance then release usually means the obstruction is cleared. This manual motion also realigns parts so the motor can spin properly when re‑energized. After turning the wrench several times, remove any debris from the chamber with tongs, restore power, press reset, and briefly run cold water while testing. If the shaft won’t move with the wrench or the motor overheats after clearing, the bearings or motor may be damaged and require professional repair or replacement.
What Tools Help Remove Obstructions Safely?
Keep a small kit handy: the correct Allen wrench for your unit, long‑handled pliers or tongs, a flashlight for inspection, and rubber gloves when disassembling parts. Never stick your hands into the grinding chamber while the power is on, and avoid poking around with screwdrivers or metal probes that can damage components. A small mirror or phone flashlight helps check hidden areas, and a bucket will catch water when disconnecting hoses or fittings. If debris is stuck deep or hard to reach, call a pro rather than risking further damage.
Before doing mechanical work, adopt preventive habits that reduce jams; the next subsection lists best practices to follow.
How Can You Prevent Future Jams in Your Garbage Disposal?
Don’t put fibrous, stringy, starchy, or very hard materials down the disposal, and always run a steady stream of cold water when using it to flush particles through the drain. Avoid celery, corn husks, large amounts of coffee grounds, bulk potato peels, bones, and grease or fats that can solidify and trap debris. Follow a simple rule: small amounts and cold water. Periodically grind ice and citrus peels to clean the chamber and help scour residues. Good habits cut jam frequency and extend your disposal’s life.
Preventive Maintenance for Kitchen Garbage Disposals: Reducing Downtime
Preventive maintenance (PM) is widely used across industries to reduce unexpected downtime, but its benefits depend on following a planned schedule and an effective checklist. Poor implementation of PM increases machine downtime because tasks are missed or done inconsistently. Improving the PM checklist simplifies technicians’ work, reduces unplanned outages, and makes it easier to track both technician performance and equipment condition.
What Should You Do If Your Garbage Disposal Is Leaking Water?

Leaks most often come from predictable spots — the sink flange, dishwasher hose connection, housing seams, or the discharge (drain) line — and finding the source tells you whether a simple tightening will fix it or if parts need replacing. Dry the area, run a small stream of water, and watch closely to see where moisture first appears; capillary action can make a leak look like it’s coming from a different place, so inspect seals, clamps, and the mounting assembly carefully. Tightening slip nuts or hose clamps will cure many minor leaks. Cracked housings, failing gaskets, or corroded flanges usually need replacement or a professional visit. If water is appearing at the motor housing or an internal seam, stop using the unit and call a technician — internal leaks can reach electrical parts.
How Do You Locate the Source of a Leak?
Dry the whole area under the sink, run a slow stream of water, and watch each junction — the sink flange, dishwasher inlet, discharge elbow, and the underside of the housing — for droplets. Use a paper towel to trace dampness back to its highest point. Check hose clamps and slip nuts for looseness that you can hand‑tighten or snug with pliers. Inspect the sink flange’s mounting ring and the putty or gasket for cracks or deterioration that let water bypass the seal. If the leak comes from a housing seam or motor area, don’t try to patch it yourself; call a pro for a safe repair.
The next subsection covers common fixes and parts for tightening and gasket replacement.
| Component | Typical Symptom | Immediate DIY Action |
|---|---|---|
| Sink flange | Water pooling around sink mouth | Dry area, tighten mounting bolts, replace plumber’s putty if needed |
| Dishwasher hose connection | Water in cabinet during dishwasher cycle | Tighten hose clamp, inspect hose for splits |
| Discharge (drain) line | Drips from slip nut or elbow | Tighten slip nut, replace gasket if worn |
| Housing seam | Persistent leak under motor | Stop use and contact a professional |
If tightening doesn’t stop the leak or the housing is damaged, replacement is often the safer and more cost‑effective option over time.
When and How Should You Tighten Connections or Replace Seals?
Turn off water, put a bucket under the connection, and use pliers to tighten clamps or a wrench to snug slip nuts — avoid over‑tightening which can strip threads or deform fittings. Replace rubber gaskets that look flattened, cracked, or compressed; common replacement kits include sink flange and discharge gaskets and will restore a watertight seal when installed correctly. Use plumber’s putty under the sink flange when reinstalling to ensure even sealing. If seals keep failing or the housing shows corrosion, schedule professional inspection and replacement to protect your cabinets and electrical components.
How Do You Clear a Clogged or Slow-Draining Garbage Disposal?
Slow drains usually come from partial clogs in the disposal, the trap, or further down the line. Many blockages can be cleared with step‑by‑step DIY methods; stubborn or recurring clogs often need a plumbing snake or professional drain cleaning. Start with a plunger while blocking the other basin (if applicable) and run cold water to dislodge soft blockages. For minor buildups, a baking soda and vinegar treatment followed by a hot water flush can help. If the clog persists or multiple fixtures are affected, use a plumbing snake from the drain access point or call a plumber to avoid pushing debris deeper or damaging seals.
Review safe DIY methods below and the signs that mean it’s time to escalate.
What Are Effective DIY Methods to Clear Minor Clogs?
Place a cup plunger over the sink drain (seal the other basin if you have a double sink) and make several firm pumps with cold water running — this can dislodge soft blockages. Try half a cup of baking soda followed by half a cup of white vinegar; wait ten minutes for foaming, then flush with several liters of hot (not boiling) water to clear grease and residue. If the P‑trap is accessible, put a bucket underneath, remove and clean it, and replace washers if needed. These methods work for many small clogs — but persistent backups, recurring slow drainage, or clogs affecting multiple fixtures indicate the need for a snake or professional help.
When Is It Time to Use a Plumbing Snake or Call a Professional?
Use a plumbing snake or call a professional when plunging and household cleaners don’t clear the blockage, when water backs up into other fixtures, or when clogs recur frequently. A snake reaches further than the trap, but if used incorrectly it can damage finishes, seals, or push debris deeper. Professionals have powered snakes and the right cameras and tools for deep or stubborn obstructions. Recurring clogs can also signal venting issues, collapsed pipes, or tree‑root invasion — problems that require diagnostics and professional repair. When in doubt, contact a qualified plumber to protect your plumbing system.
How Can You Eliminate Unpleasant Odors from Your Garbage Disposal?
Odors come from trapped food, slow drains, or biofilm on the flange and inside the chamber. Regular cleaning removes buildup and keeps the area smelling fresh. Quick deodorizing uses ice and coarse salt to scour the chamber, citrus peels for natural oils and fresh scent, and dish soap with cold water to flush away residues. For deeper cleaning, remove the sink flange and scrub the underside with a stiff brush and a mild cleaner (take care not to damage sealing surfaces). If smells persist after cleaning, residue may be farther down the drain or the trap seal could be failing. Good disposal habits and routine cleaning prevent odor buildup.
What Cleaning Techniques Use Ice, Citrus, and Dish Soap?
Pour a handful of coarse salt into the disposal, add a tray of ice cubes, then run cold water and briefly operate the unit to knock loose residue and help scour components. Follow with small citrus peels (lemon or orange) while running cold water to freshen the chamber and help cut grease. For degreasing, squirt dish soap into cold running water while the disposal runs for about 30 seconds, then flush with more cold water to carry loosened residue into the drain. These methods are safe for regular maintenance and avoid harsh chemicals that can harm pipes and seals.
How Do You Prevent Odor Buildup Long-Term?
Prevent odors by always running cold water during and after disposal use, avoiding fatty or greasy waste, and performing a monthly cleaning cycle with ice, salt, and citrus or a baking soda/vinegar flush. Wipe the sink flange and rubber splash guard regularly, and check the P‑trap and discharge elbow for trapped organic matter. Don’t let food sit in the sink or disposal for long — run the unit briefly after use to keep solids moving. Consistent care keeps odors low and cuts the need for deeper cleanings or professional work.
When Should You Call Plumbing Plus, LLC for Professional Garbage Disposal Repair or Replacement?
Certain issues need professional diagnosis and repair. Call a local plumbing company when symptoms point to electrical hazards, major leaks, or mechanical failure that can’t be fixed safely at home. Contact a pro for motor burnout, persistent electrical problems that trip breakers or reset switches, visible housing cracks or internal leaks, repeated jams that return after clearing, or when replacement is likely more cost‑effective than repair. Plumbing Plus, LLC provides same‑day service, 24/7 emergency response, financing for larger jobs, and guaranteed workmanship to restore reliable operation. If a problem risks water damage or an electrical hazard, professional service protects your home and ensures work meets local codes.
What Are the Signs That Indicate Professional Help Is Needed?
Call a professional if the disposal smells like something’s burning, trips breakers repeatedly, hums after you’ve cleared a jam, leaks from the housing, or shows visible cracks that compromise containment. Other red flags include water inside the motor area, worsening symptoms after DIY attempts, or clogs affecting several fixtures — these suggest downstream issues. Immediate professional attention is required for exposed wiring, smoke, or melting plastic. When you see these signs, technicians can safely diagnose, replace failing motors or housings, and provide durable solutions that DIY fixes can’t match.
| Symptom | DIY Fix Possible? | When to Call a Pro |
|---|---|---|
| Humming after jam cleared | Sometimes | If humming persists or motor overheats |
| Repeated breaker trips | No | Call electrician/plumber for wiring or motor fault |
| Leak at sink flange | Yes | Call pro if flange or housing is cracked |
| Cracked housing or motor seepage | No | Immediate professional replacement recommended |
Why Choose Plumbing Plus, LLC for Same-Day Service and Financing?
Plumbing Plus, LLC serves Berks, Lancaster, Lehigh, Montgomery, and Schuylkill counties with fast same‑day response and 24/7 emergency availability to handle urgent disposal failures that can cause water damage. The company offers financing to spread the cost of larger repairs or replacements and stands behind work with guaranteed workmanship. Our technicians handle diagnostics, parts, and safe electrical and mechanical repairs so homeowners avoid further damage and code issues. Calling a local pro ensures the job is done safely and promptly, especially for electrical faults, internal leaks, or compromised housings.
When you schedule a visit, expect a focused inspection, clear recommendations for repair or replacement, and options that match your timeline and budget.
What Preventative Maintenance Tips Keep Your Garbage Disposal Running Longer?
Small, regular actions prevent wear, clogs, and odors and extend your disposal’s life. Daily habits include running cold water during and after use, avoiding prohibited items, and feeding small amounts at a time. Monthly tasks include grinding ice and citrus, while quarterly checks should verify seals, hose clamps, and the reset button. A simple seasonal checklist helps you spot early problems and decide when to call for professional maintenance, avoiding emergency repairs.
Which Best Practices Help Avoid Common Problems?
Follow these clear do’s and don’ts: do run cold water while grinding and for 15–30 seconds after; do feed small, soft amounts; don’t put grease, fibrous vegetables, coffee grounds in bulk, bones, or hard shells down the unit. Use ice and salt monthly to clear residue and citrus peels periodically to freshen and cut grease. Avoid chemical drain cleaners that can damage seals. Keep a basic toolkit handy and quickly check under the sink for drips or loose clamps. These routines reduce motor strain and cut the most common causes of jams, clogs, and odors.
Recommended daily and monthly maintenance actions:
- Run cold water before, during, and after disposal use to flush particles.
- Grind ice and citrus monthly to clean the chamber and freshen the unit.
- Inspect under‑sink fittings quarterly for tightness and wear.
How Can You Use a Seasonal Maintenance Checklist?
Use a short seasonal checklist: inspect connections and gaskets for leaks, test the reset button and power, clear the drain and trap if slow, and run a cleaning cycle of ice, salt, and citrus. Spend 15–30 minutes each season to walk the list, note anything unusual, and make small fixes like tightening clamps. Keep a record to spot recurring problems. If any item shows persistent issues or internal damage, schedule a professional inspection before it becomes an emergency. Plumbing Plus, LLC also offers inspection and maintenance visits for homeowners who prefer professional oversight.
Periodic professional maintenance complements homeowner checks and can be booked when seasonal inspections reveal tightening, gasket replacement, or diagnostic needs.
Frequently Asked Questions
What should I do if my garbage disposal is making a strange noise?
Unusual noises often mean a jam or a motor issue. First, cut power to the unit to avoid injury. Look for visible obstructions in the grinding chamber using long‑handled tongs. If it hums but won’t grind, try an Allen wrench on the motor shaft to dislodge the item. If the noise continues after you clear a jam, the motor or bearings may be failing — call a professional for a diagnosis.
How often should I clean my garbage disposal?
Clean your disposal at least once a month to keep it efficient and smell‑free. Grind ice and citrus peels to remove buildup and freshen the chamber. You can also run baking soda and vinegar followed by hot water to clear residues. Regular cleaning prevents clogs and extends the life of the unit.
Can I put coffee grounds down the garbage disposal?
It’s best to avoid putting coffee grounds down the disposal. They can build up and contribute to clogs over time. Composting or throwing grounds in the trash is a better choice. If you do run them through the disposal, use plenty of cold water to help flush them, but be aware this can still cause issues long term.
What types of food should I avoid putting in my garbage disposal?
Avoid fibrous, starchy, or very hard items: celery, corn husks, potato peels in bulk, bones, grease, and hard shells can all cause jams or clogs. Feed small amounts of soft food gradually while running cold water to minimize problems and extend the unit’s life.
How can I tell if my garbage disposal needs to be replaced?
Consider replacement if you see persistent leaks, frequent jams, a burning smell, or if the unit won’t turn on after troubleshooting. Unusual grinding or rattling noises and repeated breaker trips are also signs of serious failure. If repairs are becoming frequent and costly, replacement may be the more economical choice.
Is it safe to use chemical drain cleaners in my garbage disposal?
Chemical drain cleaners are generally not recommended for disposals. They can damage the unit’s components and your pipes. Use natural methods like baking soda and vinegar, a plunger, or a plumbing snake, and call a professional if clogs persist.
What should I do if my garbage disposal smells bad?
Bad smells usually come from trapped food. Grind ice cubes and citrus peels to clean the chamber and freshen the unit. A baking soda and vinegar flush followed by hot water also helps. Regular cleaning and good disposal habits will keep odors from returning.
Conclusion
Knowing how to troubleshoot your kitchen garbage disposal helps you avoid unnecessary repairs and keeps your kitchen running smoothly. Learn the key parts, follow safe troubleshooting steps for power issues, jams, leaks, clogs, and odors, and know when to call a pro. Regular maintenance goes a long way toward reliable operation. For expert help and same‑day service, reach out to Plumbing Plus, LLC.


